In this guide, we’ll explore how to migrate existing Windows machines to a Proxmox virtualization environment. This process includes both physical-to-virtual (P2V) migrations and virtual-to-virtual (V2V) migrations from other hypervisors. We will discuss common migration scenarios, tools available for the process, and potential issues that might arise during the conversion of a Windows host to a Proxmox virtual machine.
Preparing an Existing Windows Host for Migration to a Proxmox VM
First, take essential steps to prepare the Windows host for migration:
- Backup: Create a complete backup to prevent data loss.
- Cleanup: Remove unnecessary applications, files, and temporary data from the Windows machine.
Next, download the latest VirtIO drivers ISO and install it on the Windows machine. This step ensures that the system can boot correctly after changing the disk controller and that the necessary components are initialized. If these drivers are missing, you may encounter an INACCESSIBLE BOOT DEVICE error post-migration.
You also need to check whether the Windows machine boots in UEFI or Legacy BIOS mode to configure the Proxmox VM appropriately.
Migrating Windows VM to Proxmox from Other Hypervisors
Migrating from VMware to Proxmox
Starting with version 8.2, Proxmox VE has a built-in ESXi Import Wizard that facilitates the import of virtual machines directly from VMware ESXi hosts or vCenter. After connecting the ESXi host as external storage in Proxmox, you can select and migrate the desired VM. Proxmox reads the VMX file and creates the virtual machine with matching hardware settings.
Migrating from Hyper-V to Proxmox
Currently, Proxmox does not provide tools for direct import from Hyper-V. However, you can mount an SMB share containing Hyper-V VM files, create a new VM in Proxmox with similar virtual hardware, and import the .VHDX disks using the qm importdisk command after powering off the source VM.
Creating a Virtual Image from an Existing Windows Installation
For P2V or V2V migrations, create virtual disk images of the Windows host storage. Tools that can capture and convert physical disks into virtual images include:
- Disk2vhd: This free tool allows live conversion of physical drives to VHD format using Volume Shadow Copy Service (VSS).
- Clonezilla: A bootable environment that can capture disk images.
- Veeam Agent for Microsoft Windows: Useful for backing up to external media and restoring on a new VM.
- VMware vCenter Converter Standalone: This tool converts physical machines to VMDK format over the network.
- StarWind V2V/P2V Converter.
Select the tool based on your specific migration needs. For straightforward migrations, Disk2VHD usually suffices. For more complex scenarios, Clonezilla or Veeam is recommended to capture an offline image.
After capturing the virtual disk images, copy the VHDX files to the Proxmox host and verify their integrity using the command # qemu-img check -r all /tmp/mufs01.vhdx.
Preparing a New Windows Virtual Machine in Proxmox
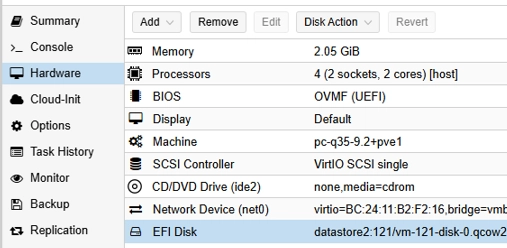
Create your new VM on the Proxmox host without a disk, ensuring the guest OS type matches your source machine (Windows). Configure resources according to requirements, select the boot firmware type (SeaBIOS or OVMF), and ensure you attach the network adapter as VirtIO.
After configuring, record the VM ID, as this will be important for future commands. Proxmox supports multiple disk formats but requires conversion for VHD or VHDX images.
Use the command # qm importdisk 102 /tmp/mufs01.vhdx datastoreMSA1 to import your disk. Then, attach the imported disk to the VM’s configuration.
To enhance performance, connect virtual disks through a SCSI controller for the Windows VM. However, initially connecting through SATA can help avoid boot issues. Follow these steps to ensure Windows installs its VirtIO SCSI controller correctly, and then reconfigure the boot settings.
Final Checks and Considerations
After migration, ensure all configurations are correctly detected in the Windows guest:
- Verify network settings and identify any residual drivers or services from the previous environment.
- Check the QEMU Guest Agent service is running and verify that all applications and services operate as expected.
- Be aware that some applications may require reactivation due to changes in hardware.
This guide covers the critical steps for successfully migrating Windows machines to the Proxmox platform. For in-depth resources, please refer to the relevant articles on Proxmox documentation and Disk2vhd.