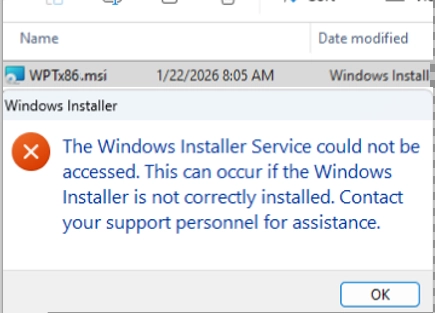
The built-in Windows Installer service (msiserver) is crucial for installing software distributed as MSI packages, managing installation processes, updates, and removal of applications. When this service is missing, disabled, or corrupted, users may encounter the error message:
The Windows Installer Service could not be accessed. This can occur if the Windows Installer is not correctly installed. Contact your support personnel for assistance.This guide explains how to check the Windows Installer service status and repair it if necessary. It also covers using the service in Safe Mode to uninstall problematic software.
Checking the Windows Installer Service Status
To verify the status of the Windows Installer service, follow these steps:
- Open the Services snap-in by typing
services.mscin the Run dialog. - Look for the Windows Installer service, which typically has a Manual startup type.
You can also check the service status using PowerShell with the command:
Get-Service msiserverAdditionally, ensure that the Remote Procedure Call (RPC) service is running, as it is required for the msiserver service:
Get-Service msiserver -RequiredServicesIf you discover the service is disabled, change its startup type to Manual by modifying the registry key located at HKLMSYSTEMCurrentControlSetServicesmsiserver and setting the Start parameter to 3 (manual start).
How to Repair the Windows Installer Service
If the Windows Installer service is present but not functioning, you can re-register it using an elevated Command Prompt. Enter the following commands:
msiexec /unregservermsiexec /regservernet stop msiserverregsvr32 /u /s %windir%System32msi.dllregsvr32 /u /s %windir%System32msihnd.dllregsvr32 /u /s %windir%System32msisip.dllregsvr32 /s %windir%System32msi.dllregsvr32 /s %windir%System32msihnd.dllregsvr32 /s %windir%System32msisip.dllnet start msiserverIf the service is missing, you can restore it by importing a registry file with the default configuration. Download the msiserver_original_win11.zip, extract it, and run the msiserver_original_win11.reg file. Restart your computer afterward to apply changes.
If system files are missing or corrupted, use the following commands to repair them:
DISM /Online /Cleanup-Image /RestoreHealthsfc /scannowHow to Run the Windows Installer Service in Safe Mode
To uninstall software that may prevent Windows from booting normally, you can use Safe Mode. Here’s how to enable the Windows Installer service in Safe Mode:
- Hold the Shift key and click on Restart.
- Navigate to Troubleshoot > Advanced options > Startup Settings.
- Press F4 to boot into Safe Mode.
In Safe Mode, you generally cannot access the Windows Installer service. To enable it:
- Open the Registry Editor (
regedit). - Navigate to
HKEY_LOCAL_MACHINESYSTEMCurrentControlSetControlSafeBootMinimalorHKEY_LOCAL_MACHINESYSTEMCurrentControlSetControlSafeBootNetwork, depending on your Safe Mode type. - Create a new key named MSIServer and set its value to
Service.
To create this entry via command line, use:
REG ADD "HKLMSYSTEMCurrentControlSetControlSafeBootMinimalMSIServer" /VE /T REG_SZ /F /D "Service"After enabling, start the service using:
net start msiserverThis workaround allows you to install or uninstall applications that rely on the Windows Installer service directly from Safe Mode.