If you’re looking to run applications remotely in a more efficient manner, utilizing RemoteApps can be a great solution. RemoteApp technology, while officially supported on Windows Server, can also be configured on desktop versions like Windows 10 or 11, specifically in Pro or Enterprise editions. This setup allows applications hosted on a remote server to appear as if they are running locally on your device, streamlining the user experience.
To get started, here’s how to set up your remote computer to host RemoteApps:
-
Enable Remote Desktop Protocol: On the computer you want to use as the RDP server, you need to enable Remote Desktop.
-
Install the Desired Applications: Next, install the applications you wish to run remotely.
-
User Access: Make sure to add any users who need access to the application to the local
Remote Desktop Usersgroup or configure the local policy to allow access. -
Configure Group Policy: Access the Local Group Policy Editor and navigate to:
Computer Configuration -> Administrative Templates -> Windows Components -> Remote Desktop Services -> Remote Desktop Session Host -> ConnectionsEnable the policy Allow remote start of unlisted programs. Alternatively, you can create a registry entry with the same purpose.
-
Restart the Remote Computer: After making the necessary configurations, restart the remote machine to apply the new settings.
If you wish to restrict which local applications can be accessed as a RemoteApp, create specific registry keys for each application underHKLMSOFTWAREMicrosoftWindows NTCurrentVersionTerminal ServerTSAppAllowListApplications.
Client Configuration
Now you’ll need to set up a connection on the client device to access these RemoteApps:
-
Open Remote Desktop Connection: Launch the Remote Desktop Connection client and enter the DNS name or IP address of the RDP server.
-
Configure Connection Settings: Optional settings include configuring local device redirection for drives, clipboard, printers, etc.
-
Save Connection Settings: Save the configurations as a
*.RDPfile. -
Edit the RDP File: Open the saved RDP file in a text editor and append the following:
remoteapplicationmode:i:1RemoteApplicationName:s:YOUR_APP_NAMERemoteApplicationProgram:s:"PATH_TO_YOUR_APP"DisableRemoteAppCheck:i:1Prompt for Credentials on Client:i:0Alternate Shell:s:rdpinit.exeYou can also add command line parameters if needed.
-
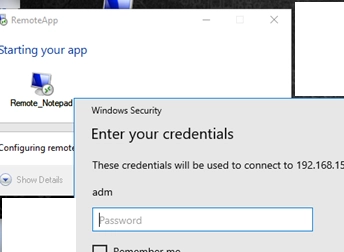
Launch the Application: Double-click the RDP file to initiate the connection. A password prompt will appear, and upon confirming the certificate, the RemoteApp will display on your desktop.
For running Microsoft Store applications, the format in the RDP file’s RemoteApplicationProgram section would look something like this:
start shell:AppsFolderPACKAGE_NAME!AppIf you regularly create shortcuts for RemoteApps, consider using the RemoteApp Tool, which simplifies the process of generating RDP and MSI installer files.
It’s important to note that this method allows you to use RemoteApps without needing a dedicated RDS licensing server, though it limits you to one simultaneous RemoteApp session. If you need more concurrent sessions, tools like RDP Wrapper can help override this limitation.
For additional information, visit the related links:
- Deploy Remote Desktop Services (RDS) role
- Allow log on through Remote Desktop Services
- Managing the Remote Desktop Group Policy settings
- Securing RDP Connections
With these steps, you can effectively run your applications as RemoteApps on Windows 10 and 11 without the need for a full Windows Server environment.
