Sometimes, you may need to manually configure network connection priorities to route traffic correctly on a Windows computer with multiple network adapters (Ethernet, Wi-Fi, VPN).
Windows automatically assigns priorities for network adapters based on connection (link) speed. The higher the connection speed, the higher the priority of such a network adapter (the lower the interface metric value). Windows typically uses the following priorities for different network interface types:
- Ethernet
- Wi-Fi
- Mobile connections
If your computer is connected to a 100Mbps Ethernet port and a high-speed Wi-Fi router, you may find that the wireless network connection is prioritized.
List available IPv4 network adapters and their priorities in Windows:
Get-NetIPinterface | where AddressFamily -eq "IPv4"
The InterfaceMetric value determines the priority of a network interface. The lower the InterfaceMetric, the higher the network connection priority.
Below are the results of the command from two different computers. The first screenshot shows that the Ethernet connection has a higher priority than the wireless Wi-Fi adapter. The second screenshot is taken from a computer with two Ethernet ports with the same priority.
The InterfaceMetric value indicates the priority of the IP route through this network adapter in the Windows routing table.
route print
route print‘ command is the sum of the InterfaceMetric value from the Get-NetIPinterface command and the RouteMetric value from the Get-NetRoute command.According to this routing table, network traffic will be sent by default through the first network interface with the lower metric.
Using PowerShell, you can check which network adapter will be used to access the Internet according to the current routing table:
Get-NetRoute -DestinationPrefix 0.0.0.0/0
Two network routes with the same interface metric exist in this case. This means you cannot know which adapter is used for Internet access.
To manually change network interface metrics and assign priorities, use the Set-NetIPInterface cmdlet. To lower the priority of one of the interfaces, specify its name (InterfaceAlias) or interface index (ifIndex) and the new metric value:
Set-NetIPInterface -ifIndex 14 -InterfaceMetric 26
or
Set-NetIPInterface -InterfaceAlias Ethernet1 -InterfaceMetric 26
Make sure that the metric value for this adapter in the routing table has changed.
You can also change the priority (metric) of a network interface in the network adapter properties using the Network Connections applet (ncpa.cpl) in the Control Panel.
Open the properties of the IPv4 protocol in the adapter settings -> Advanced -> change the value in the Interface metric field and apply the changes.
By default, the Automatic metric option is enabled here, which indicates that the network adapter priority is set automatically according to the link speed.
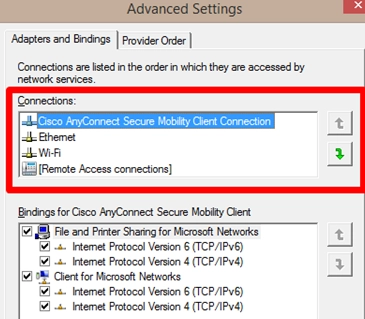
Before Windows 10 and Windows Server 2016, network adapter priorities could be configured using the Adapters and Bindings dialog. However, this Control Panel item has been removed in later versions of Windows.
Welcome to our blog! Stay tuned here for more interesting articles and stories. Our content is carefully curated to bring you the latest insights and developments. Keep reading to enhance your knowledge and broaden your horizons.
