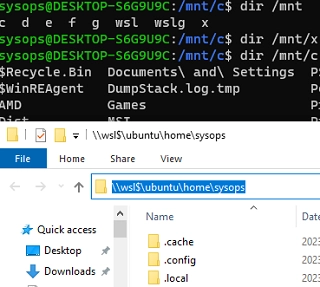
There are several ways to mount and access physical, virtual, or network drives in Windows Subsystem for Linux (WSL2). By default, the WSL environment mounts all Windows logical drives to the /mnt/ directory. In addition, you can access the WSL file system directly from File Explorer running on the Windows host by using the UNC path \wsl$ (for example, \wsl$ubuntu).
This guide explains how to mount different drives in a WSL environment.
How to Mount Physical Drive (Partition) in WSL2
Windows Subsystem for Linux (WSL 2) makes it possible to mount physical drives or specific partitions with file systems that are not supported by the Windows host itself. The /proc/filesystems file contains the list of supported filesystems in WSL.
For example, you have a physical disk with ext4 partitions on it and you want to access them from WSL.
Before proceeding, check and update your WSL 2 version:
wsl --update
Then list the available disk devices in Windows:
wmic diskdrive list brief
Two physical disks are connected to the computer in this example.
You can mount an entire hard disk drive in the WSL:
wsl --mount \.PHYSICALDRIVE2
Or just a specific partition:
wsl --mount \.PHYSICALDRIVE2 --partition 1
The partition of the physical hard disk will be mounted in the directory /mnt/wsl/PHYSICALDRIVE2p1.
You can access files on this partition from a Windows host using a UNC path: \wsl$ubuntumntwslPHYSICALDRIVE2p1.
Check that the ext4 filesystem partition is accessible in WSL:
“`html
$ lsblk -o NAME,FSTYPE,SIZE,MOUNTPOINT
To unmount the partition, run:
wsl --umount \.PHYSICALDRIVE2 --partition 1
“`
To automatically mount a physical disk partition when a user logs on to Windows, create a simple scheduler task using PowerShell:
$TaskName="WSL_Mount_DISK1_PART1"
$Trigger= New-ScheduledTaskTrigger -AtLogOn
$Action= New-ScheduledTaskAction -Execute "cmd" -Argument "/c wsl --mount \.PHYSICALDRIVE2 --partition 1"
Register-ScheduledTask -TaskName $TaskName -Trigger $Trigger -Action $Action -RunLevel Highest –Force
Mounting Windows Network Drives in WSL
In WSL, you can access shared folders on network computers or NAS devices. There are two ways to mount network drives in WSL:
- You can mount a network drive that is mapped in Windows and has a drive letter assigned to it.
- It is possible to use the CIFS/SMB client in WSL to mount a shared network folder using a UNC path.
For example, you have mapped a network drive using GPO or with the net use X: \192.168.100.12tools command. To access this network drive from WSL:
- Create a mount point:
$ sudo mkdir /mnt/x - Mount the drive:
$ sudo mount -t drvfs X: /mnt/x - Now you can access files and folders on the network drive.
To automatically mount this network drive, add the following line to /etc/fstab:
X: /mnt/x drvfs defaults 0 0
Then mount all the file systems:
$ mount -a
Shared network folders can also be mounted directly from SMB-enabled devices using the CIFS package.
$ sudo apt install cifs-utils
 $ sudo mount -t cifs -o user={user},pass={password},iocharset=utf8,vers=3.0 //192.168.100.12/tools /mnt/tools
This example uses the SMB 3.0 protocol to connect to shared folders instead of SMBv1 which is disabled by default in current versions of Windows.
Attach Virtual Hard Drive (VHD/VHDX) in WSL
VHD/VHDX virtual hard disks can also be mounted with WSL. If the Hyper-V PowerShell module is installed on the computer, create a new virtual disk file using the command:
New-VHD -Path $env:USERPROFILEwsl_shared_disk.vhdx -Dynamic -SizeBytes 20GB
Then mount the VHDX file in WSL:
wsl --mount --vhd $env:USERPROFILEwsl_shared_disk.vhdx --bare
Now you can create a partition table and a partition with the ext4 file system on the virtual disk:
$ lsblk
$ sudo parted /dev/sdc print
$ sudo parted /dev/sdc mklabel msdos
$ sudo parted -a optimal /dev/sdc mkpart primary ext4 0% 100%
$ lsblk -o NAME,FSTYPE,SIZE,MOUNTPOINT /dev/sdc
$ sudo mkfs.ext4 /dev/sdd1
Then you can mount a new partition to a directory by its UUID:
“`html
$ sudo blkid
 $ sudo mount UUID=c04d0309-b93a-47f2-ae0d-79c95c80cd51 /home/sysops/vhdx
ext4.vhdx virtual disk in the C:Users[user]AppDataLocalPackages[distro]LocalState[distroPackageName] folder. If you don’t have enough free space on the system drive, you can move the VHDX file that contains the WSL image file system to another drive.“`
