Let’s examine how to incorporate a standalone host with an ESXi hypervisor into the VMware vCenter Server (vCSA) for administrative centralization and utilization in cluster setups.
Establish a connection to the vCenter Server by launching the vSphere Client URL in your internet browser (https://vcenter_server_fqdg_or_ip/ui).
Choose the datacenter, folder, or cluster where you intend to introduce the new ESXi host:
- Right-click on the Datacenter and select Add Host.
- Specify the FQDN name (preferred) or IP address of your ESXi host.
- Enter the root credentials.
- vCenter Server connects to the ESXi host through 902 TCP/UDP ports. The current SHA1 fingerprint of the ESXi host certificate appears in a window. Confirm the connection (the certificate will be replaced with the certificate issued by the vCenter Certificate Server).
- If you connect to the ESXi console using SSH, you can check the current SHA1 certificate fingerprint:
# openssl x509 -in /etc/vmware/ssl/rui.crt -fingerprint -sha1 -noout - A table with ESXi host information (version and registered VMs) appears. All virtual machines registered on the ESXi host will be added to the current vCenter inventory item.
- Select whether to use vSphere Lifecycle Manager for ESXi image management.
- At the Assign License stage, you must select one of the ESXi licenses available in the vCenter Server. By default, a 60-day Evaluation License is used.
- vCenter cannot manage VMware Hypervisor hosts with a free license.
- You can enable Lockdown Mode to restrict direct local access to ESXi from the console.
- Click Next -> Ready to complete.
The new ESXi host appears in the vCenter inventory after a few seconds.
# configstorecli config current get -c esx -g services -k vpxa_solution_user_config |grep -i server_ip
If you have multiple ESXi hosts that require adding to vCenter all at once, automating this process with PowerShell can be a significant help.
Install the VMware.PowerCLI module on the computer of the administrator:
Install-Module -Name VMware.PowerCLI
 # Bypass self-signed certificates:
 Set-PowerCLIConfiguration -Scope AllUsers -InvalidCertificateAction Warn
Establish a connection to vCenter:
connect-viserver -server vcsa1.woshub.loc
To add an ESXi host to the vCenter Server, use the command:
Add-VMHost -Name 192.168.11.95 -Location HQDC -Force
Type the ESXi host root password:
Resetting the root password on VMware ESXi.
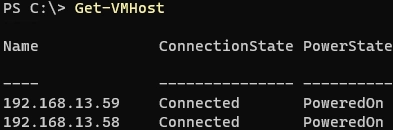
Check that the host is connected to vCenter:
Get-VMHost
Use this script if you need to add multiple ESXi hosts to vCenter at once:
$ESXiHosts = "esxi1.woshub.loc", "esxi2.woshub.loc"
$Location = "HQDC"
$credentials = Get-Credential -UserName root -Message "Enter ESXi password"
Foreach ($ESXiHost in $ESXiHosts) {
Add-VMHost -Name $ESXiHost -Location $Location -User $credentials.UserName -Password $credentials.GetNetworkCredential().Password -RunAsync -force
Write-Host -ForegroundColor GREEN "Adding $ESXiHost to vCenter"
}