Sudo, short for “Superuser do,” is a privilege elevation utility popular on Linux systems. It makes it easy for administrators and developers to quickly switch between admin and non-admin tasks. It can also be used to run commands as another user. Sudo for Windows is Microsoft’s sudo implementation.
Sudo allows you to prepend sudo to a command to run that command with administrative privileges. You return to a non-privileged prompt after the privileged command returns. This allows you to switch between privilege levels easily.
Alternatives to Sudo for Windows
There are three main alternatives for executing commands with administrator privileges:
- Running the shell as Administrator. They can run all admin-level commands within it. However, the downside is the necessity to manage the overhead of switching between different shells to carry out both admin and non-admin tasks.
- Utilizing Runas. Runas is a command-line utility in Windows that enables a user to operate specific programs within the target user’s permissions and environment. However, Runas always demands a password, whereas Sudo can be set up to run without a password for the specific user executing the Sudo command. Sudo can also be tailored to run all commands in a single window, unlike Runas, which initiates a new window for privileged commands.
- Use of Gsudo. Gsudo is an external application that imparts Linux’s sudo functionality to Windows. They can execute their commands in a non-privileged shell and utilize gsudo when required to run admin-level commands. The only downside of this approach is that gsudo is a third-party application, and despite being recommended by Microsoft, there are no guarantees or assurances of compatibility with future Windows versions or ongoing support.
Enabling Sudo for Windows
If they wish to enable sudo for windows, they can register as an insider and then update their system to at least Windows 11, build 26052.
To activate Sudo for Windows, navigate to Settings -> System -> For developers.
Toggle Enable Sudo On. Sudo for Windows offers three configurations: In a new window, Inline, and With input disabled.
How to use Sudo for Windows
To see Sudo in action on Windows, open up a terminal. Three configurations are available: forceNewWindow, disableInput, and normal. In the Settings app, they correspond to In a new window, With input disabled and Inline, respectively.
ForceNewWindow mode
Every command run with sudo is executed in an elevated new window in this mode. You can check the currently active mode in the terminal with the sudo config command.
sudo config
For example, running the netstat command with sudo opens a new window. Netstat, as shown below, lists all connections (a) with the processes that created them (b).
sudo netstat -ab
Before the elevated window opens, you must consent by selecting Yes at the User Account Control prompt.
Sudo triggers UAC
Netstat runs in an elevated window, which closes automatically once execution is complete.
Executing a command with sudo in a new window
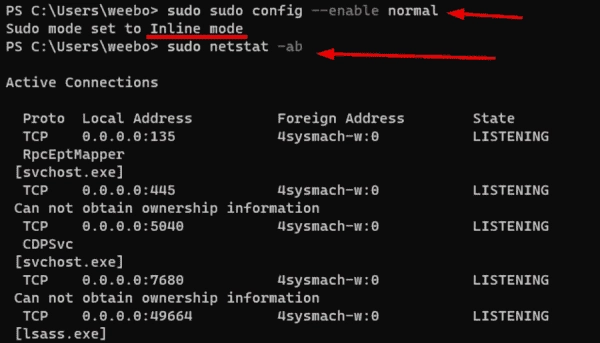
Normal mode
Normal mode runs elevated commands in the same terminal window — like sudo on Linux.
You can manage Sudo’s configuration through its config subcommand. The following commands will put Sudo in normal mode to run netstat.
sudo sudo config --enable normalsudo netstat -ab
Running sudo in normal mode
DisableInput mode
DisableInput mode is akin to normal mode except for the fact that commands running in this mode are unable to accept user input. In the standard mode, you can initiate a new elevated shell, such as cmd, and consequently execute a series of commands with superior privileges. This can be equated with the default sudo behavior on Linux.
In the disableInput mode, this is unfeasible. This forms a security measure that hinders potentially malevolent code from infusing keystrokes into the elevated console.
sudo sudo config --enable disableInputsudo cmd
The latter command corresponds to sudo su on Linux.
Running sudo in disableInput mode
Sudo for Windows vs. Sudo for Linux
Sudo for Windows only supports a subset of the features of its Linux counterpart. One key difference is that Sudo for Windows does not support a udoers file. The sudoers file in Linux is a configuration file that specifies which users or groups can run commands as root or other users through the sudo command, providing fine-grained access control.
Sudo for Linux also enables you to run commands as any user. Sudo for Windows only allows you to run commands as an Administrator.
Conclusion
This article gave you a hands-on look at Sudo for Windows, differentiating it from existing solutions. If you have tried the new Windows feature, please share your experience in the comments below.