Unlocking the Potential of Proxmox Containers
Proxmox, a powerful virtualization platform, offers more than just virtual machines (VMs). With Proxmox, you can also create and manage containers. While the default container type is Linux Containers (LXC), it is possible to set up a Docker environment within Proxmox, either within an LXC container or a VM. However, it is important to note that Proxmox only supports native operation of Linux containers, and not containers running on other operating systems such as Windows or FreeBSD. In such cases, a VM can be utilized.
To manage containers, Proxmox provides the Proxmox Container Toolkit (PCT), which includes both a web-based console and a CLI tool called pct. In this blog post, we will demonstrate how to create a container using the web interface, using Observium, a monitoring software, as an example.
To begin, navigate to the Proxmox server’s page in the web interface and click on “local”. On the right-hand side, you will find the available container templates under “Container Templates”. Using the search feature, locate the desired container template, such as the turnkey-observium image, and download it to your local server.
Once downloaded, the container image will appear in the “Container Templates” window. Only these images can be selected when creating a container. To initiate the container creation process, click on the “Create CT” button located at the top right of the homepage. This will launch a wizard that guides you through the creation process.
In the first page of the wizard, select the Proxmox server and specify the container ID, name (under “Host”), and a password. On the next page, choose the previously downloaded image and the storage location on the Proxmox server. At this point, you also have the option to use an Ubuntu image for the container and later install Observium within it using a script.
The subsequent configuration steps are similar to those for other containers, allowing you to customize settings for disk space, CPU, memory, network, and DNS. Containers share the same resources as VMs. Once you start the container, it will appear on the web interface and can be accessed via the Console feature. If the environment does not boot up automatically, you can manually start it through the container’s context menu.
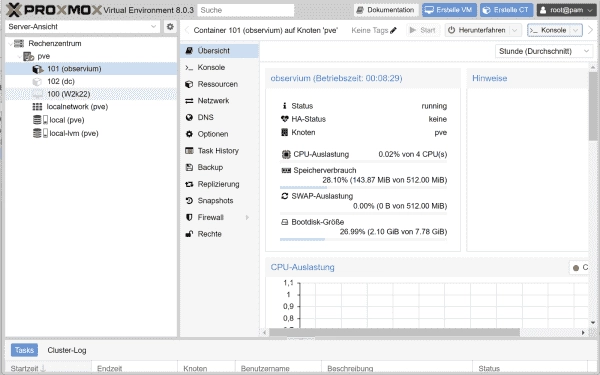
By clicking on a container, you can view the menu options on the right-hand side, which enable you to manage containers. The “Overview” section displays the current resource usage, which can be modified using the corresponding menu item. The “DNS” and “Network” options are responsible for network settings, while the “Firewall” area handles security. Backing up the container can be done through the “Backup” feature, allowing you to create snapshots that can be used to restore the container to a previous state.
User management can be performed through permissions. Additionally, the container’s context menu on the left side provides the ability to clone the container and save it as a template with all the configured settings. These templates can then be utilized to create new containers.
The Proxmox virtualization environment offers the flexibility to run containers alongside VMs. While Linux containers are the native format supported by Proxmox, the platform provides various templates to simplify container creation. By downloading and utilizing these templates, users can effortlessly create containers using a graphical wizard, with the added convenience of adjusting resource allocations and configurations. Furthermore, individually configured containers can be saved as templates, offering a seamless workflow for container management.
Join our IT community today to stay updated with the latest news and community updates. Gain access to ad-free articles and discover opportunities to contribute as an author for 4sysops.