Why Ansible?
The main reasons why you should consider using Ansible for automation are as follows:
Agentless architecture: Ansible is agentless, which means that it does not require the installation of software or an agent on the target machine. It uses SSH and WinRM to communicate with remote servers.
Idempotence: Applying the same steps multiple times using Ansible will not yield varying results or cause unintended issues.
Declarative language: Ansible uses YAML as its scripting language to set tasks for automation, defining the desired outcome and letting Ansible determine how to achieve it.
Module system: Ansible provides a varity of built-in modules useful for tasks like installing packages and managing files. If required, users can also create their own modules.
Integration: Ansible can seamlessly blend with numerous tools and platforms such as cloud services, version control systems, and monitoring services.
Security: Ansible offers security features, such as Ansible Vault, which allows you to store and protect your confidential data, such as passwords or API keys.
Ansible components
Ansible comprises a set of key components that help automate tasks and manage systems. Understanding these components is critical in understanding the functionality of Ansible. The main components of Ansible are as follows:
Control node: The computer system or server where Ansible is installed and from which you manage your infrastructure is called the control node. You can use the control node to define automation tasks, manage your inventory, and execute playbooks.
Managed node: This term refers to a remote system, server, or device that can be communicated with and managed by Ansible. The nodes under management are defined in an Ansible inventory file. This file acts as a catalogue or directory of the nodes where Ansible can execute automation tasks.
Inventory: Essentially, this is a configuration file that contains details about the remote hosts and systems that are to be controlled and automated.
Playbooks: These fundamental components of Ansible are penned in YAML format and they define a series of tasks Ansible needs to perform on its managed nodes.
Tasks: These are the specific actions Ansible carries out on target hosts. Tasks are set within plays in a playbook. Each task outlines which module needs to be used, how parameters should be passed to it, and optional conditions outlining when the task is predicted to run. Tasks can conduct a range of activities, such as software installation, system configuration, and file copying.
Prerequisites
To follow this guide, you will need three machines in the same subnet with Ubuntu installed. The machine that you will utilize as your Ansible control node should have SSH access to two managed nodes via public authentication. In other words, a private key should be installed on your control host, and the corresponding public keys should be installed on the managed nodes. For those unfamiliar with SSH public authentication, you can read this guide.
Setting Up an SSH key pair
Prior to installing Ansible, we will establish a new dedicated SSH key pair on the Ansible control node. This allows for secure, passwordless authentication when connecting to Ansible-managed nodes.
Log in to your Ansible control node, and run the ssh-keygen command to generate a 2048-bit RSA key pair.
ssh-keygen -t rsa -b 2048
This command prompts you to choose a location to save the SSH key pair. By default, keys are saved in ~/.ssh/idrsa (private key) and ~/.ssh/idrsa.pub (public key). You will also be prompted to define a passphrase for your private key. You should leave it blank for passwordless task execution.
Next, copy the public key to all managed nodes that you want to manage from the Ansible control node. You can use the ssh-copy-id command to copy your public key to both managed nodes. Replace the username and managed-node-ip with the appropriate values.
ssh-copy-id root@managed-node-ip
Note that this command only works if your user account already has SSH access to the managed node via public key authentication (see prerequisites).
This command will copy your public key to the managed node’s ~/.ssh/authorized_keys file and set the correct permissions. When you run this command the first time, SSH checks a database containing identification for all hosts to prevent server spoofing. This message is normal, and it appears when you connect to a new remote host for the first time. Just type Yes and press the Enter key.
Copying the SSH public key to a managed node
Now verify that your SSH key pair is set up correctly, and you can authenticate to the managed node using the key.
ssh ubuntu@managed-node-ip
You should now be able to log in to the remote node without entering a password.
Verifying SSH connectivity
Installing Ansible on Ubuntu
Ansible can be installed on various platforms, including Linux, macOS, and Windows. The installation process may differ depending on the platform. In this guide, our Ansible control host will run Ubuntu.
First, install the software-properties-common package to easily add new APT repositories in Ubuntu-and Debian-based operating systems.
Sudo apt install software-properties-common -y
Next, add the Ansible official repository using the add-apt-repository command.
Sudo add-apt-repository ppa:ansible/ansible
Next, install Ansible using the apt command.
Sudo apt install ansible -y
After installation, you can verify that Ansible is correctly installed by running the following command:
ansible –version
Setting up an Ansible inventory file
The Ansible inventory file identifies the target hosts, their IP addresses, and any essential connection information that Ansible will oversee.
The default position of the inventory file is /etc/ansible/hosts on the Ansible control node. Alternatively, you can generate an inventory file at a custom site and point it out when operating Ansible commands.
To see the catalogue of prevailing inventory configurations, execute the ansible-inventory command:
ansible-inventory --list
Showing Ansible default inventory configurations
Next, edit the default Ansible inventory file using the nano editor.
sudo nano /etc/ansible/hosts
The default inventory file offers a number of examples which you can use as a guide to establish your initial inventory. This particular example includes two remote nodes and their IP addresses.
[node1]192.168.1.20
[node2]
192.168.1.21
Be sure to input the correct IP addresses for your systems. Once done, save and close the file, then authenticate your inventory setup using the command detailed below:
ansible-inventory –list
This will show your added node information, as shown in the following screenshot:
Showing managed node information
Next, edit the ansible.cfg configuration file to specify various settings and configurations for your Ansible environment.
sudo nano /etc/ansible/ansible.cfg
Add the following configurations:
[defaults]inventory = /etc/ansible/hosts
remote_user = unbuntu
private_key_file = ~/.ssh/id_rsa
ansible_python_interpreter = /usr/bin/python3
A brief explanation of each configuration is provided below:
- inventory: Specify the path of your inventory file.
- remote_user: Set the default SSH user for connecting to remote nodes.
- private_key_file: Specify the default SSH private key file.
- ansible_python_interpreter: Set the Python interpreter to be used on remote hosts.
Verifying the connection
After configuring an inventory file, you will need to verify whether Ansible can connect to your remote nodes and run commands via SSH.
Let’s run the ansible command to perform a connectivity test using the ping module.
ansible all -m ping
This command attempts to connect to all nodes from your default inventory file and run the ping module. If the connections are successful, you will see output similar to the following:
Verifying connectivity between the control node and the managed nodes
The “ping”: “pong” line in the above screenshot indicates a successful connection to the managed nodes.
Working with Ansible ad hoc commands
Your Ansible control node is now able to communicate with both remote nodes. Let’s dive in and explore how to run Ansible ad hoc commands. Ansible ad hoc commands are one-line commands that allow you to execute single tasks from the command line interactively.
The basic syntax for running Ansible ad hoc commands is shown below:
ansible -m -a
Let’s examine some instances where one might utilize Ansible ad hoc commands.
Verify memory usage
With Ansible, you can employ the shell module to execute any command on the targeted nodes. For instance, to inspect the memory usage on node1, the free -m command can be run in the shell module:
ansible node1 -m shell -a "free -m"This command will run the free -m command on node1 and display the memory usage information.
Checking memory usage on managed nodes
Verifying disk usage information
To check disk usage on both target nodes, run the following command:
ansible all -m shell -a "df -h"
This command will scan every node in the inventory file, execute the df -h command on all nodes, and show the information on disk usage.
Displaying disk usage information for both nodes.
Installing packages
You can use the apt module to install packages on Ubuntu-based operating systems.
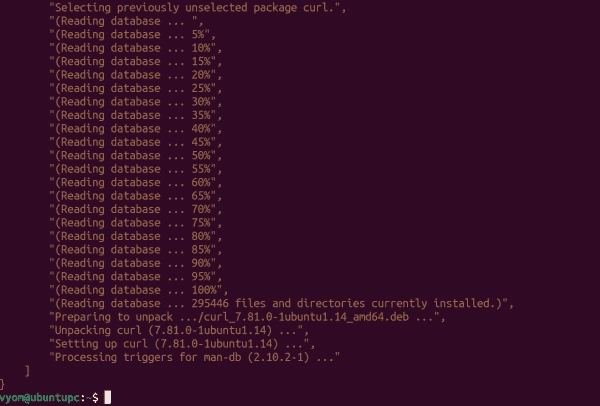
For example, run the following command to install the curl package on node2.
ansible node2 -m apt -a "name=curl state=present" -b
This command will install the curl package on node2 using the apt module.
-b or –become instructs Ansible to use privilege escalation (sudo is the default).
The parameter state=present clarifies the intended state of the curl package on the intended system. Let’s look at what it signifies:
state=present: This directive tells Ansible to confirm that the package is in place on the target system. If the curl package is absent, Ansible will execute the installation. However, if the package is present, Ansible will leave it as is. This state does not trigger an upgrade of the package to the most current version; it only confirms that the package is installed. This is different from other states that you could specify for the package, such as:
state=absent: This state ensures that the package is not on the target system. If it exists, Ansible will proceed to uninstall it.
state=latest: This ensures that the latest version of the package is installed. If an older version of the package is installed, Ansible will upgrade it to the latest version.
Installing curl package on node2
Restarting a service
You can use the service module to manage services on specified nodes.
For example, to restart the Apache service on node1, you can run:
ansible node1 -m service -a "name=cron state=restarted" -b
This command will connect to node1 via SSH and restart the cron service.