Domain Name System Security Extensions (DNSSEC) is a set of security protocols designed to protect the integrity of the DNS protocol. By utilizing cryptographic signatures to validate DNS responses, DNSSEC enhances security against threats like DNS spoofing and cache tampering. In this guide, we will cover how to configure DNSSEC on a Windows Server, along with additional protective measures like DNS Cache Locking and DNS Socket Pool configuration.
Steps to Configure DNSSEC on Windows Server
-
Configure DNSSEC
- Open Server Manager.
- Navigate to Tools > DNS.
- Expand the server and select the Forward Lookup Zone. Right-click on the domain controller and choose DNSSEC > Sign the zone.
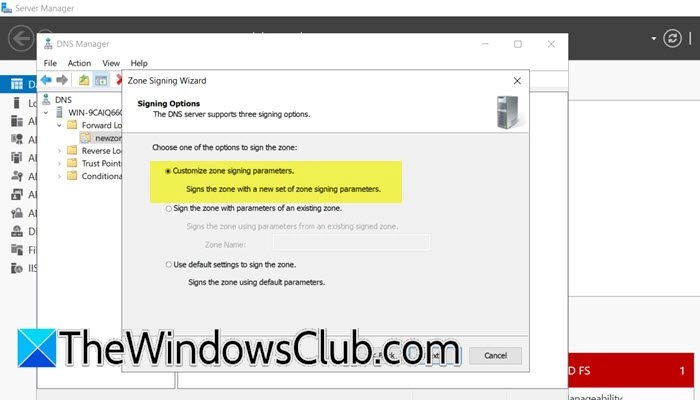
- Launch the Zone signing wizard and click Next.
- Choose Customize zone signing parameters and proceed.
- In the Key Master window, select the option that indicates the DNS server is the Key Master, and click Next.
- On the Key Signing Key (KSK) interface, click Add and fill in necessary fields according to your organization’s needs, then click Next.
- For the Zone Signing Key (ZSK) option, click Add, fill in the required details, and save.
- On the Next Secure (NSEC) screen, provide details. NSEC records help to prove that a domain name does not exist.
- On the trust anchors page, enable both Enable the distribution of trust anchors for this zone check and Enable automatic update of trust anchors on key rollover, then click Next.
- Enter DS details on the Signing and Polling Parameters screen, then proceed through the summary and finish the setup.
- Verify the configuration by going to Trust point > ae > domain name in the DNS Manager.
-
Configure Group Policy
- Launch the Group Policy Management program.
- Navigate to Forest: Windows.ae > Domains > Windows.ae, right-click on Default Domain Policy, and select Edit.
- Under Computer Configuration > Policies > Windows Settings, access Name Resolution Policy.
- In the right pane under Create Rules, input Windows.ae in the Suffix box.
- Check the boxes for Enable DNSSEC in this rule and Require DNS clients to validate name and address data, then click Create.
-
DNS Socket Pool
DNS Socket Pool increases security by randomizing source ports for outgoing queries. To adjust the socket pool size:
- Open PowerShell as an admin and run the command:
Get-DNSServer - Check the current size with:
Get-DnsServerSetting -All | Select-Object -Property SocketPoolSize - To increase the socket size, run:
dnscmd /config /socketpoolsize 5000 - Restart your DNS Server to apply changes.
- Open PowerShell as an admin and run the command:
-
DNS Cache Locking
DNS Cache Locking preserves cached DNS records from being overwritten during their TTL, adding data integrity. Check the current locking percent:
Get-DnsServerCache | Select-Object -Property LockingPercent- To set the locking percent to 100, if it’s not already:
Set-DnsServerCache –LockingPercent 100
Implementing these measures will significantly secure your DNS Server.