Windows 10 introduced numerous settings that are queried during the OOBE phase. Windows 11 continues this with new dialogs for system configuration.
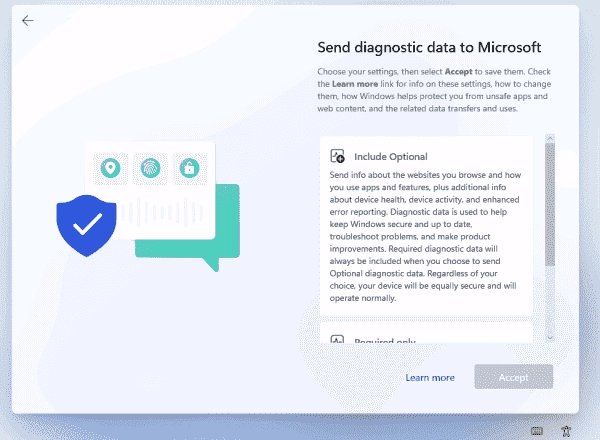
Among other things, it asks for the desired privacy settings. These include the handling of telemetry data, the use of the advertising ID, and the location or information for finding a device in case of loss.
The decision to transfer diagnostic data to Microsoft should not be left to end users.
In managed environments, it is almost always undesirable for users to create their own accounts for subsequent login. While Microsoft has made creating local accounts more obscure, successfully completing this step would grant users local admin privileges.
Logging in with a Microsoft account or creating a local admin account by the user is typically undesired on corporate PCs.
To enable users to log in with their domain account, the computer must be joined to the domain in an earlier setup phase. This is no longer possible during the OOBE section.
Creating a local account involves answering three security questions.
Automating the OOBE phase can prevent problematic system configurations and save users from a task that could be time-consuming. This is also particularly useful for administrators or advanced users who frequently set up new virtual machines with Windows 11, for instance.
Create an answer file for OOBE
In order to create a response file, the Windows System Image Manager (Windows SIM) is necessary, and this is part of the Assessment and Deployment Toolkit (ADK). To see the necessary settings, an installation image from Microsoft’s ISO file, commonly install.wim, should be opened.
The first time the tool is utilized, it will ask if you want to create a catalog file. This should be approved, which will need administrative privileges and a bit of patience.
Next, drag the entries
amd64_Microsoft-Windows-International-Core_10.0.<Build-Nummer>_neutral
amd64_Microsoft-Windows-Shell-Setup_10.0.<Build-Nummer>_neutral
from the window at the bottom left to 7 oobeSystem in the middle window using the mouse. Be careful to pick the right ones since there are namesake containers with the prefix wow64.
Now, at this point, the tree view appears with all the container’s settings.
Settings for language and region
During the OOBE phase, the setup prompts for the desired language, keyboard layout, or region to set the time format, for example. These settings can be automatically configured through the component amd64_Microsoft-Windows-International-Core__neutral.
Here, you fill out the following fields:
- InputLocale (language for input devices, keyboard layout)
- SystemLocale (default language for non-Unicode programs)
- UserLocale (determines the formatting of time, date, currency, and numbers per user)
- UILanguage (language of the graphical user interface)
All settings can be specified according to RFC 3066, such as de-DE for Germany or en-US for the US. InputLocale also accepts hexadecimal values; a list of all codes can be found on Microsoft Docs. Multiple values can be entered here, separated by semi-colons.
Configuring regional settings in Windows System Image Manager
Dialogs for EULA and user accounts
To automatically configure these settings, expand the component amd64_Microsoft-Windows-Shell-Setup__neutral and navigate to the OOBE section, where you can hide various installation dialogs. For this purpose, use:
- HideEULAPage
- HideOEMRegistrationScreen
- HideWirelessSetupInOOBE
- HideOnlineAccountScreens
- HideLocalAccountScreen
Set all of them to the value true. The first option skips the license agreement confirmation, while the last two skip the dialogs for creating an account (online and local).
Privacy settings
Configuring privacy settings, such as which data is sent to Microsoft or whether applications can access the user’s location, can be skipped by assigning the value 3 to ProtectYourPC.
Skip dialogs for EULA, create an account, and privacy settings.
If you wish to manage these settings in the future centrally, you can do so through Group Policy.
Create a local account
If you have hidden the dialogs for creating user accounts, you will likely create an account via the answer file. Otherwise, the computer will only have the disabled Administrator and some system accounts.
Create a new local account during setup.
This can be completed under UserAccounts => LocalAccounts. You also get the choice to store the password immediately. If you automatically set up an administrative account with an answer file, you should then centrally manage its password with LAPS in AD situations.
In a fresh answer file, the value for PlainText is True by default, which gives you the ability to simply input the password. If you don’t want it stored as clear text in the unattend.xml file, you will have to mark the checkbox for Hide Sensitive Data in the Tools menu.
Should you want to modify the file at a later date, it will have the encrypted password, and PlainText will show a False value. To have the ability to modify the password, you must initially set the content of the <PlainText> element to True in the XML file.
Additional settings
Under Microsoft-Windows-Shell-Setup, there are more options that can be useful for OOBE automation. Users are not forced to configure these settings during setup by default, but you can further customize the system to meet specific requirements this way.
With the TaskbarLinks option, you can pin up to five programs to the taskbar. Additionally, you can specify a user account for automatic login here. Under DesktopOptimization, you can ensure that pre-installed store apps do not appear on the taskbar.
However, some settings are outdated. This includes the configuration of the Start menu and VisualEffects. Also, using FolderLocations only in test environments is advisable because moving profiles to another volume can cause issues.
Assign the answer file to an image
Microsoft offers several ways to assign an answer file to an image for unattended installation. Regardless of the method chosen, it is recommended to save the file under the name unattend.xml.
In most cases, however, you will integrate them into the system image, with the setup offering several directories to choose from. Suitable options include %SystemRoot%system32panther or the root directory of the system drive. Alternatively, you can also provide these on a USB stick.
If you are utilizing an ISO file for the installation process, which is often the case when Windows is being set up as a guest OS within a VM, the contents of the ISO file will have to be copied into a specific directory. Following this, the answer file must be added, and subsequently, the entire structure should be packed back into an ISO file.
Summary
Using an answer file to automate the Windows installation process is a tested and proven method. It allows configuration settings to be set in various setup phases depending upon the chosen deployment method.
The Out-of-box Experience (OOBE) holds significant importance, because it enables users to set up the system through a series of dialogues. This setup includes privacy settings, regional and language settings, and account creation.
In managed environments, this is usually not a task for end users. Utilizing an unattend.xml file, all processes can be hidden from the users and settings pre-configured according to the desired values. A beneficial side effect is that it significantly accelerates the setup process for users.
Appendix: Template for unattend.xml
If your goal is to configure only the discussed settings using an answer file, you have no need to create it with Windows SIM. Instead, you can simply modify the unattend.xml listed below to suit your personalized environment.
The password for the local account in this template is set to “P@ssword”. To alter it in the answer file, you should adhere to the previously described steps.